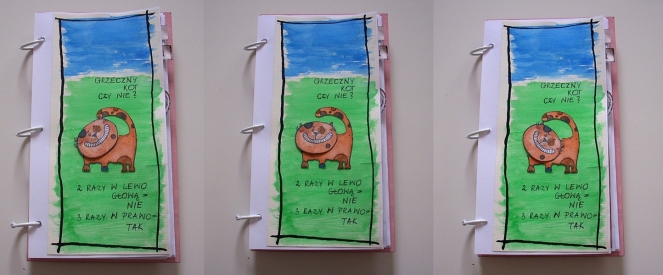
Today an easy Do It Yourself mini tutorial. I will show you how to create e.g. a moving head of an animal which you stamped of cut from any paper. I created the same way the cat below from my Art Journal.
Dziś mały kurs w jaki sposób zrobić ruszającą się np. głowę na obrazku, np. taką jak u tego kota z mojego Art Journala poniżej.
So, let’s just start!
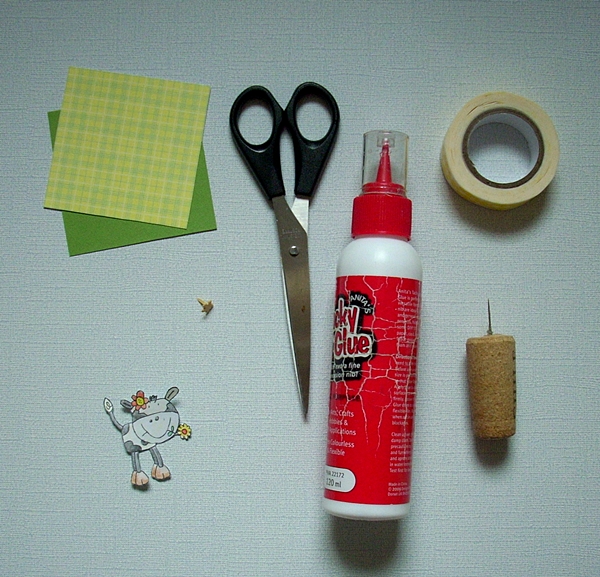
What you’ll need are:
– scissors,
– a stamp or a picture,
– one really small brad with a very flat head,
– glue,
– some paper or paper scraps.
To do dzieła!
Będą potrzebne:
– nożyczki,
– stempel lub obrazek,
– jeden bardzo mały ćwiek z płaską główką,
– klej,
– jakieś kawałki papieru.
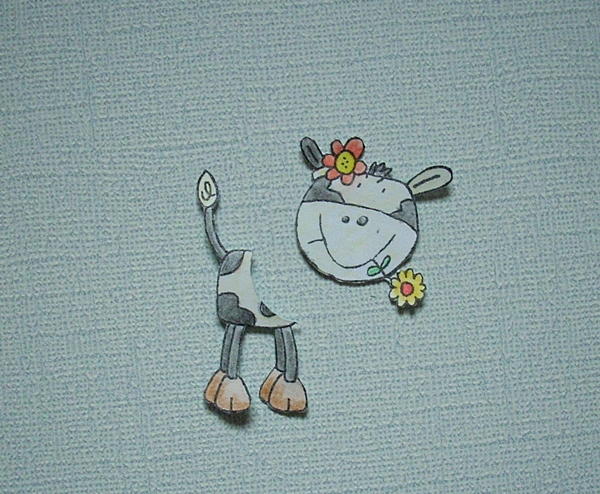
In order to start, you need to cut a picture, it can be a stamp or a picture e.g. from scrapbooking paper, the important is only that the part you want to move to be really clear like this cow’s head. Which you need to also cut and separate from rest of the picture.
Żeby zacząć trzeba wyciąć obrazek lub stempel, ważne jest żeby część która ma się ruszać (w tym przykładzie jest to głowa), żeby była wyraźnie oddzielona od reszty, żeby łatwo można było ją od tej reszty odciąć.
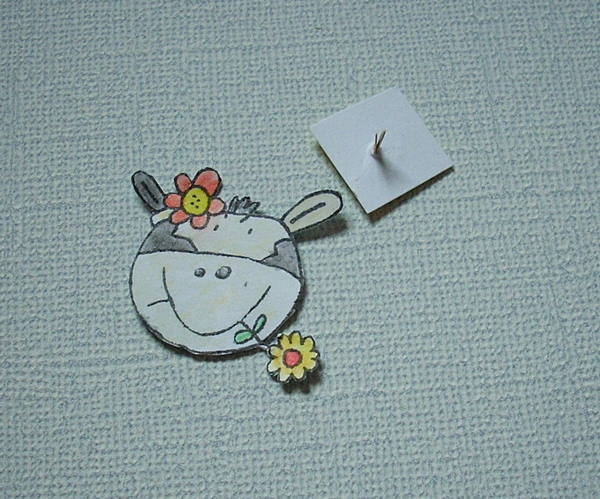
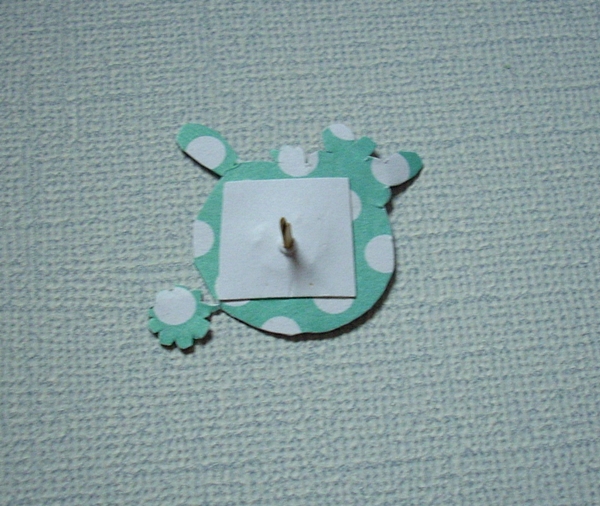
The next thing is to cut a tiny piece of paper (smaller than the moving part of the picture) and attach a brad to it.
Następnie trzeba wyciąć sobie mały kawałek papieru (mniejszy od ruszającej się głowy) i zamontować na nim ćwiek.
When you attached brad to the little paper you need to place the „moving part” (in my case head) upside down and adhere the little paper from the side of the brad’s head. Just remember to put the glue only on the edges of the paper, so that the brad could turn around.
Jak już to Wam się uda, to trzeba mały kawałek papieru przykleić do tylniej strony „głowy”, tylko pamiętajcie, żeby przyklejać papierek tylko na brzegach, żeby przypadkiem klej nie uniemożliwił obracania ćwiekiem.
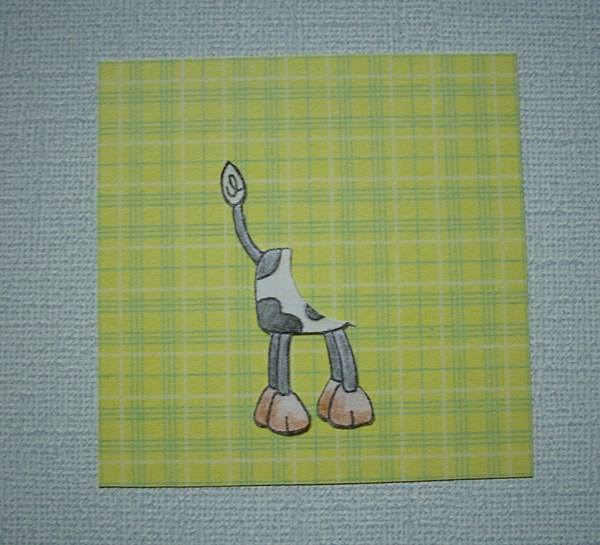
After that you need to adhere the rest of your picture to the paper.
Następnie trzeba przykleić pozostałą część obrazka do jakiegoś kolorowego papieru.
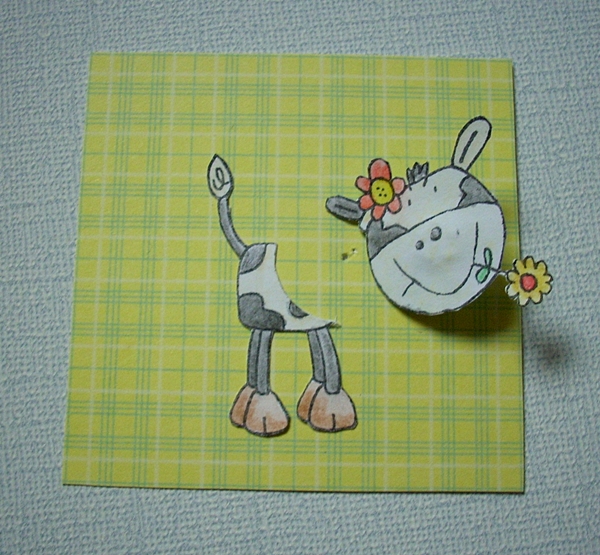
The last thing is the hardest I think, as you need to carefully measure where you need to attach the „head”. As you can see above I wasn’t that careful and had to do it twice, actually it is not a problem unless it hides under the head. Of course you attach the head with use of the „wires” from the brad. When it is already there you need to try whether it turns the head correctly 🙂
Ostatnią i chyba najtrudniejszą rzeczą jest wymierzenie, gdzie dokładnie ruszająca głowa ma być umieszczona. Jak widzicie na zdjęciu powyżej ja robiłam dwukrotnie dziurkę na ćwiek, bo za pierwszym razem wyszło mi krzywo. Nie ma z tym w sumie problemu o ile te dziurki zmieszczą się pod „ruszającą głową”. Aha, oczywiście głowę montujemy za pomocą wąsów od ćwieka. Jak już jest to zamontowane, to tylko trzeba sprawdzić, czy głowa dobrze się obraca 🙂
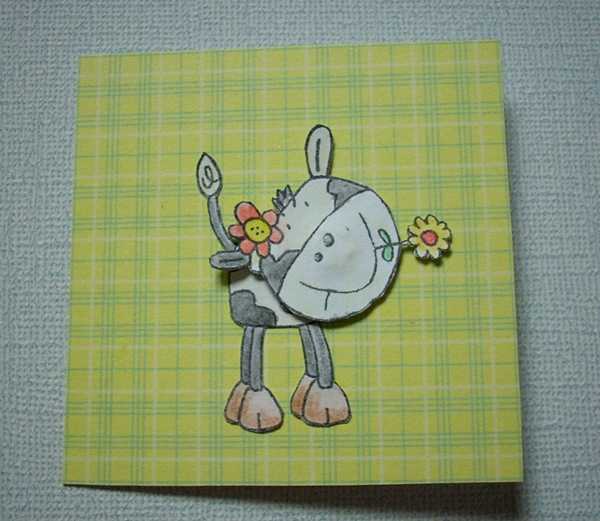
Above you can see how it looks like more or less 🙂
A powyżej efekt mojej głowy 🙂
