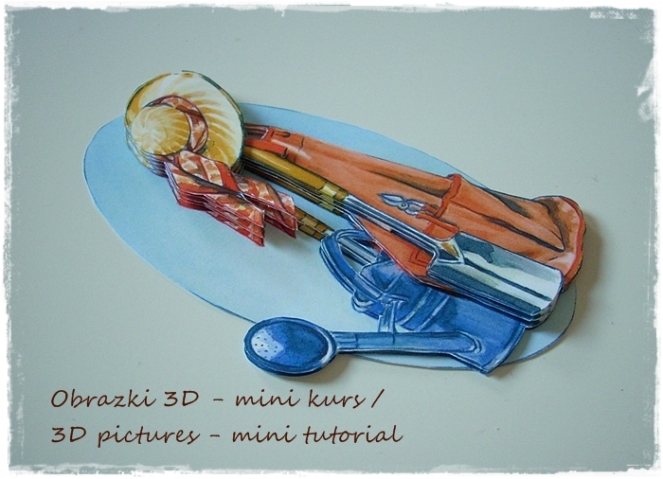
Dziś u mnie po raz pierwszy na blogu mini kurs. Tak jak obiecywałam ostatnio, przy okazji publikacji kartek świątecznych, na których głównym szczegółem były obrazki 3D, tak też dziś publikuję w jaki sposób coś takiego może powstać. Wszystko jest dość proste, zresztą zobaczcie sami. Pokażę w jaki sposób może powstać obrazek jak na banerze powyżej.
Today for the first time, here on my blog a mini tutorial. As I promised recently, when I showed the cards with 3D pictures, I am showing today the „how to”. I believe it is really simple, let’s have a look. I will show you, how you can create a picture like the one above.
Do wykonania takiego obrazka potrzebujemy:
– obrazka 3D (można taki zakupić przypuszczalnie w sieci, ja ten akurat prezentowany otrzymałam kiedyś jako prezent od Marianne Design),
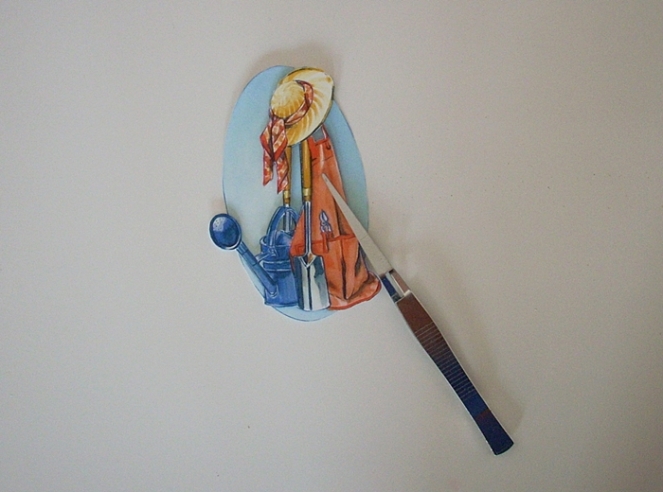
– nożyczki – ostre, mogą być takie małe, do wycinania szczegółów,
– kosteczki 3D – u mnie 1mm, można używać różnych grubości – żeby bawić się bardziej efektami,
– nożyk taki jak do tapet, ale koniecznie ostry,
– mata do cięcia (nie ma na zdjęciu, bo moja trochę „niefotogeniczna” jest :)).
To make the above picture you’ll need:
– a 3D picture (the one presented on the photo, was a gift from Marianne Design, but I am sure you can buy such pictures in Hobby Store),
– scissors – very sharp,
– 3D foam adhesive, I use 1mm,
– a knife – same as used to cut the wallpapers, it needs to be really sharp,
– a mat for cutting (it’s missing on the following photo, as mine is not worth showing at all :)).
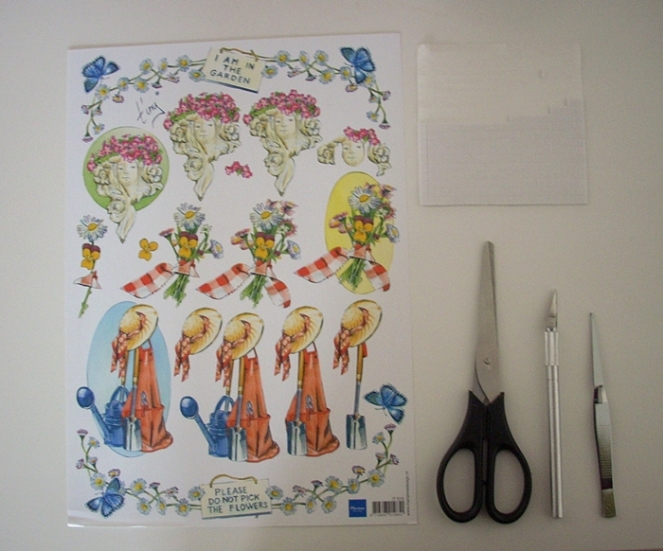
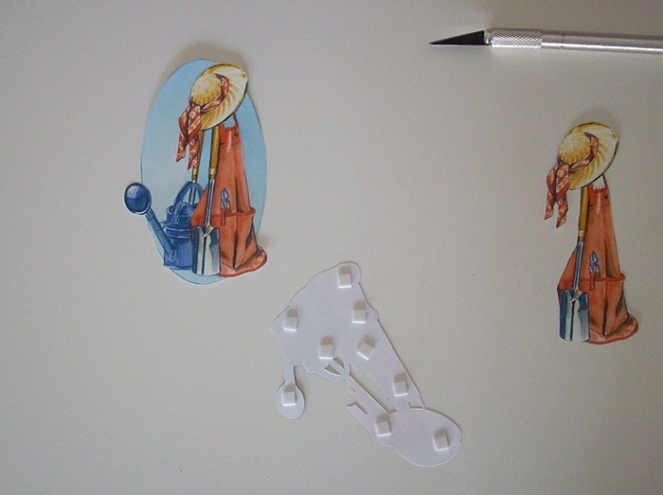
Zwykle specjalne takie papiery do efektów 3D mają na jednym arkuszu kilka obrazków, na tym powyżej pokazanym są np. głowa kobiety z wiankiem, bukiet kwiatów oraz ubranie ogrodnicze wraz z akcesoriami. Wybieramy sobie jeden z obrazków i wycinamy, a resztę zostawiamy na przyszłość.
Usually these special papers with 3D pictures include two or more different pictures. The one above includes the picture of a lady, a bouquet of flowers and gardening clothing with some accesories. We need to choose one of these and cut it out, the rest can be used later in the future.
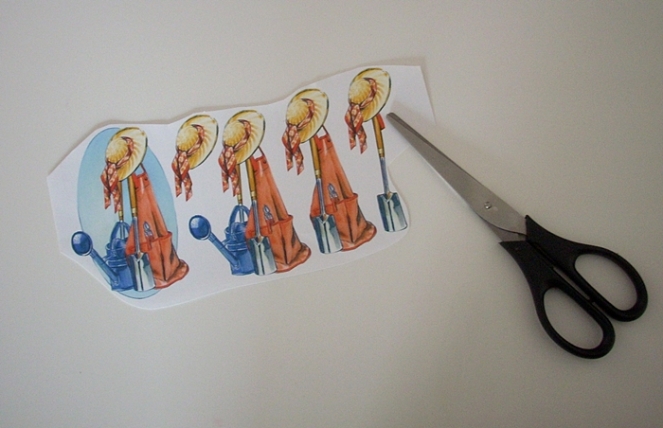
Dalej wycinamy obrazek bazowy i całą resztę obrazków. Obrazek bazowy to ten, który akurat na tym zdjęciu ma niebieskie tło. Normalnie łatwo to rozpoznać, bo baza jest największa i posiada wszystkie kolorowe detale, kolejne warstwy, mają coraz to mniej detali i dużo białego tła, aż do najmniejszych elementów.
Then we need to cut out the base picture and the other ones. The base picture is the one which (precisely at the following photo) has the blue background. It is easy to recognize, ’cause the base is the biggest and has the most color details. The following layers have less and less details and a lot of white background.
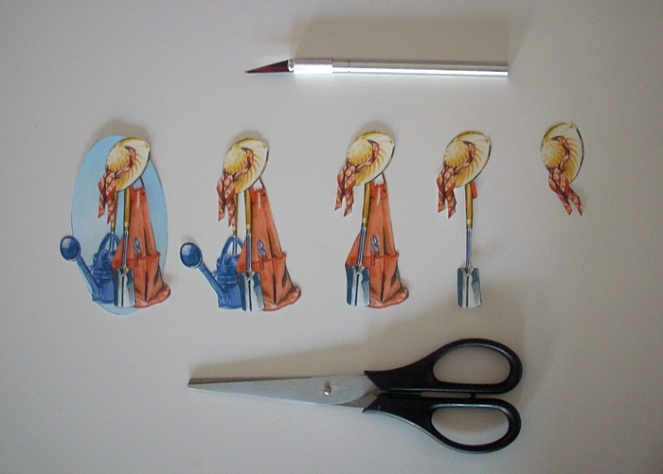
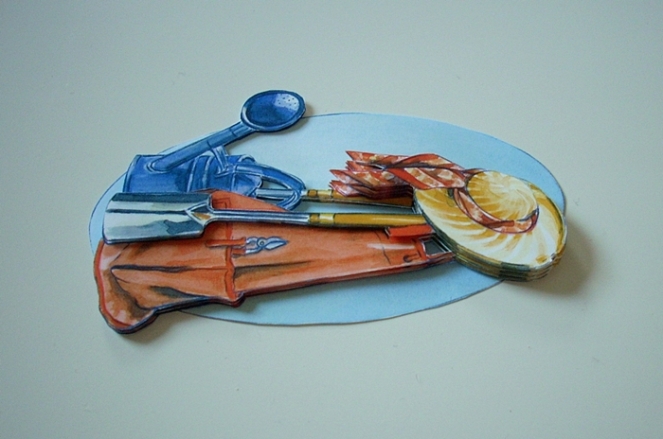
Ja ułożyłam na zdjęciu powyżej wszystkie warstwy po kolei od lewej do prawej. Bazę zostawiamy, pianką 3D podklejamy warstwę, która będzie na bazie.
On the picture above I put all the layers in the correct order from left to right. We leave the base one as it is, the next one needs to get the 3D adhesives on the bottom side.
Następnie bardzo ostrożnie i dokładnie bierzemy warstwę i naklejamy na bazę. Wszystkie linie muszą się idealnie zgadzać z tymi na bazie.
Next step is to take the prepared layer and very carefully adhere it to the base. All the lines and details from the base need to be covered.
Tak samo robimy z każdą kolejną warstwa, aż do końca.
The same way you need to handle with all other layers, till the last one.
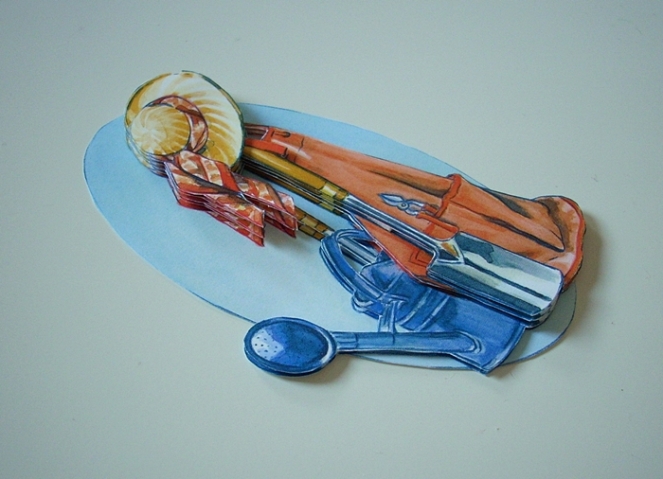
Wyżej widać efekt końcowy. Nie pozostaje nic innego jak tylko użyć obrazka na kartce lub w jakimś innym projekcie.
The final result is above. So, right now there is nothing else to do with it but to use it in one of your cards or any other projects.
Na koniec jeszcze kilka uwag albo moim obserwacji:
1. Do wycinania zewnętrznych krawędzi używam zwykle nożyczek, nożyka używam do bardzo małych detali wewnątrz obrazka. Nożyczkami po prostu idzie mi szybciej.
2. Używając nożyka staram się robić bardzo krótkie nacięcia i ich bardzo dużo, żeby nie poprzecinać niektórych wąskich elementów.
3. Papier specjalny, który akurat tu używam bardzo różni się od scrapbookingowego. Jest on przede wszystkim sporo cieńszy, ale też śliski, co chyba pomaga przy wycinaniu.
4. Bardzo podobne efekty można uzyskać za pomocą np. stempli odbijając je kilkakrotnie i wycinając elementy, którym chcemy dodać wypukłości. Jednak uważam, że papier z którego powinno się je wycinać nie powinien być zbyt gruby, bo patrząc z boku będzie widać grubość papieru i cięcie, a niekoniecznie efekt 3D. A tu przykład gdzie ja wykorzystałam stempel do efektu 3D.
Finally some comments from me:
1. I usually use scissors to cut out the outside elements and for the tiny ones inside the picture I use the knife. It is just easier and faster with the scissors for me.
2. When using the knife I try to cut really slowly and really tiny parts, so that I am sure I did not cut the necessary element.
3. This special paper which I actually here in this tutorial used is very different than the scrapbooking one. It is a lot thinner and satin. I think it helps when cutting out elements.
4. Very similar effects you can get when using stamps and you just cut out from the stamp the details you’d like to have the 3D effect. Although I believe you need to be careful with the use of the paper to press the stamp, the thinner it is the better 3D result you’ll get. Here is the example of my own trial with 3D effect and stamps.
Chętnie poczytam Wasze uwagi na temat tego kursu. A jeśli komuś się on przyda, to chętnie zobaczę efekty 🙂
I am really curious to read what you think about this tutorial. If somebody finds it useful, I will be really glad to see the results 🙂


